Before we begin, let me expound for a bit on learning Japanese.
First off, don't. I'm serious, barring a very good reason, there is no way that the time you spend studying Japanese will ever see anything even remotely comparable to an adaquate payoff. "Ahh, but I have a very good reason.", I hear you cry. Does that reason involve family, locational requirements, or business? If it does, then fine, you may proceed. If it doesn't, you should think long and hard as to why you're making the attempt. If it (your reason) in anyway includes that you wish to better appreciate various aspects of Japanese pop-culture (anime, video games, comics, or any of the number of reasons you might be reading this blog), then for the love of all that you hold good, STOP NOW!
Put simply, thanks to the growing popularity of such things abroad, and a large group of OCD fans, anything (pop culture stuff) that you might ever wish to read or watch in Japanese that is worth reading or watching, will probably be translated for you. There are other people out there who will gleefully do all the work of learning the language and painstakingly translating whatever it is you want. Why should you work when they're willing to do it for you?
Now, it can be argued tha the translations you get, even in products you paid for, is shaky at best. Still given the learning curve of Japanese, I'd take someone elses shaky for free over my own probably even more shaky cost me years of study.
That being said, let's get down to brass tacks. I have studied Japanese for many years, and I am not good at it. In fact, I am very, very bad at it. While expressive this is not perhaps accurate enough, I am so bad at the language that I have achieved a sort of legendary status among those unfortunate enough to have to deal with me in an academic environment.
Among my many woes with the Japanese language, is the small matter of Kanji. I hate Kanji. I hate them with a passion that burns like a thousand fiery suns. My hatred of Kanji is so great that by simple association, I also hate all other pictographic writing systems. Needless to say, my ability to write the blasted things is not particularly good.
So it was much to my surprise that I encountered James Heisig's Remembering the Kanji. A random web browsing brought into my possession the free demo pdf that let's the uninitated take his style for a test drive. Intrigued, or at least really bored with doing whatever it was that I was supposed to be doing, I opened the file and started reading.
Heisig makes the claim that circumstances had him arriving late at a language school in Kamakura, so that he was unable to join that semester's classes. Still, everyone recommended that since he had many years of Kanji tedium ahead of him, he might as well start now. On his own, and without real academic guidance, he proceeded to master all 2,000 of the commonly used kanji in a month. It's about this point where any rational person should close the file, delete it, and never think about it again.
However, I was procrastinating, an activity I take rather seriously, so I pressed on. Things don't improve much as Heisig describes his method. He breaks all Kanji down into his own system of primitives; these primitives being unusual in that not all of them are an accepted Kanji radical, or a kanji in and of itself. He then assigns each of these primitives a single english word. Kanji are then built by memorizing a mnemonic story involving these words.
It sounds both terribly silly and incredibly roundabout as a way of doing things. Unfortunately, at least for me, it also seems to work. After 6 lessons in 4 days, totalling over 100 kanji I'm still going strong with almost no difficulty, despite what I said above. It seems, all in all, too good to be true, and for all I know, it may be. It could be that once I reach the higher numbers of kanji covered my brain starts to forget the stories of the earlier ones. I'll tell you when I get there.
Still, for all that I want to sacrifice goats in praise of Mr. Heisig, his method does have it's flaws. For one, no attention whatsoever is paid to the pronunciation of the kanji. His first volume covers solely remembering how to write them, something of perhaps questionable value (although, I must say that I wish I had discovered his book say ... during my freshman year Japanese, where it would have been of incalculable value on those kanji quizzes). While his second volume apparently addresses the pronunciation, I am not privy to that text and so can not adaquately (or arbitrarily) speak as to its effectiveness. Additonally, some of the stories that Mr. Heisig uses seem ... well ...awkward at best. Still, since he apparently stops giving them at some point, leaving you to craft your own, everyone will adjust as need be.
The only real remaining problem is the book's limited print run. As of this date, good luck actually finding a copy of his book from which to study. Amazon.com wants $300 for a single copy. While new prints are apparently on the way, word is that they won't be ready till at least May. Still, at such time as I can order a copy for around $40, I would gladly pay that price. And that's saying something.
Musou Orochiis a new game from Koei's musou series of mass-mayhem action games. The ancient god Orochi has risen from the depths and wreaked havoc with space-time, allowing generals from both Dynasty Warriors and Samurai Warriors to co-exist and battle either for or against a common foe -- Orochi.
It sounds dumb, yeah, but as is the case with any crossover between popular franchises, Musou fans should love it.
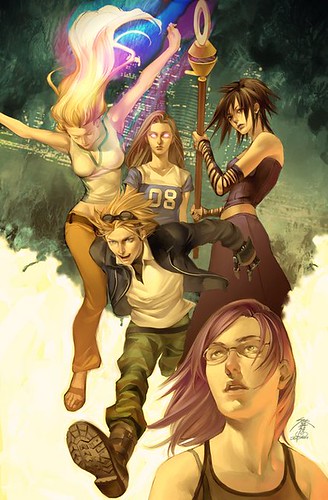
Marvel Comics hasn't been the same since the post-bankruptcy reorganization (a blight on you, Joe Quesada, for that awful Civil War crap!), but it's still capable of putting out a comic now and then that's worth reading (for example: Agents of Atlas). Runaways is one such title: I've read all 42 issues so far (published in two separate volumes), as well as the (immensely crappy) Runaways/Young Avengers: Civil War crossover and even the X-Men/Runaways mini-book they gave away during the Free Comic Book Day 2006 publicity event. I can't really say what fascinates so much about the series, since it doesn't do anything (i.e. plot, art, drama, romance, general suspense) exceptionally well, but if you dig deep down into my subconscious (stay out! It's not pretty down there), you'd probably find that I just appreciate a comic with characters who respond realistically to the problems heaped upon them through the wiles of the comic book gods. Also doesn't hurt that there aren't any, as David would put it, "narrative buzzkills" in sight.
Runaways is the story of six teens who, through mere happenstance, discover that their parents are super-villains plotting the destruction of the world. The original roster consisted of:
* Alex Wilder (16), the son of underworld mafia rulers. * Nico Minoru (16), the daughter of dark sorcerers. * Chase Stein (17), the son of mad scientists. * Gertrude Yorkes (15), the daughter of time travelers. * Karolina Dean (16), the daughter of space aliens. * Molly Hayes (11), the daughter of evil mutants.
The teenagers ran away from home, decided to fight against their evil parents, and eventually succeeded. Then they had to deal with a slew of issues including being placed into foster homes by the Avengers, fighting crooks trying to fill the power vacuum left behind by their powerful parents, fending off a support group founded by former teenage superheroes, and combating an online cabal of role-playing geeks thinking they were the super-villains in that struggle against their "'rents." Two of the original members were killed off and replaced by:
* Victor Mancha (17), the cyborg son of Ultron. * Xavin (???), the child of marauding Skrulls.
I recommend reading the newly released Runaways Saga for a quick "primer" on everything that's happened so far. Anyway, I like the way the series realistically portrays the doubt, confusion, and general insecurity of the Runaways. Hey, I was a teen myself not too long ago, so I can easily understand that how, in a situation like the one the Runaways found them in, the whole world would appear to them to have gone mad. Even though they hail from the same universe as such prolific superhero teams as the Fantastic Four, the Avengers, and the X-Men, the Runaways are not one such team: they're just a bunch of frightened, confused kids who have come to distrust adults and who have no choice but to rely on each other for support. Most of their adventures have been entertaining and provide welcome catharses from the over-dramatic, poorly written (and incredibly poorly edited!) "flagship" titles Marvel produces nowadays.
Sadly, though, an era has just ended for the Runaways. Brian K. Vaughan, who created and wrote all 42 issues of the comic so far, is leaving the franchise for a while. In his stead, Runaways will now be written by...
...
...Joss Whedon. Supposedly the change will only last for one six-issue story arc, but this is Joss Whedon. One can't underestimate the amount of narrative damage Joss can inflict over six issues of a comic.
With all the pomp and circumstance normally attributed to the despot ruler of a banana republic (and all the accountability of an unpaid internet "journalist") I prepare to pass judgement on RahXephon.
In what was almost certainly a mistake, I watched the entire series over the course of the past 24 hours. This might not, by itself, have been so bad if I hadn't done the same thing with Negima over the weekend. Regardless, while my brain is still seeped in Xephonic vapors I will take this time to ruminate a bit on the topic.
The first thing you think, on watching RahXephon, is "My god, they're ripping Eva off so hard it hurts." I immediately began drawing character parallels between various characters between the show. As things progress, and the show gets some ground under its legs, it manages to establish itself as more than just an imitation.
The series does, however, stick with many of the genre cliches. Look, it's the monster of the week. Good thing the destined shounen can hop in his giant robo and save us all. Oh no, damage has been done, will the varied cast of support characters be able to fix it in time?
Moreover, it's not terribly subtle with many of its character related plot twists. Put simply, if you're paying attention, there's very little left byepisode 6 that should really surprise you with regards to the character interactions. The same can not be said of the plot twists which are at times so random and seemingly arbitrary that you can can only absorb each event in a sort of zen like stupor.
If I'm giving the impression that I didn't like the series, then do not let my overly caustic nature deceive you. I actually rather fancied it. The pacing was such that I felt compelled to strive forward throughout the entirety of the series. There was never a point where I felt that here was a comfortable stopping point, or rest. It is a rarity for me to find a show so absorbing.
By series' end, things have resolved themselves satisfactorily (well, sorta). Several plot threads are left unfinished, but are done so in such a way that it doesn't much matter. However, the theatrically released movie does indeed tie some of these wandering narrative threads up.
Other than these revelations, though, the movie is largely dissapointing, consisting of a few new scenes and a lot of jerky editing of the regular television show. Since it establishes itself as a new continuity, those aforementioned revelations are themselves called into question. Indeed, with the way things are reworked, various facts from both continuties could not rationally be true in the other.
Still, considering the sum totality of the series, I approve. RahXephon provides a thoughtful giant robo romp without all of Eva's distressing emotional baggage. It's still got some of it, but there's no warm liquid goo phase to live down. Watch it if you get the chance.
I've never talked about sports on this blog, and I doubt I ever will -- while I like watching and playing sports (what?! I do play a couple of... well, okay, only basketball... say, when do they declare DDR an official sport?), it's just not something that my friends (and, by extension, the readers of this blog) are interested in.
With that said, there's a great storyline brewing in the NCAA Women's Basketball Tournament. Kay Yow, the Hall of Fame head coach of the North Carolina State University Lady Wolfpack, has been fighting breast cancer for the better part of the past three years. Please read this inspirational (and bittersweet) account of everything that she manages to do for her team during the darkest days of her life.
It's hard for me to care about N. C. State (once a Tar Heel, always a Tar Heel), but I can and will root unequivocally for Kay Yow and her team. She's displaying superhuman loyalty, dedication, and perseverance every day of her life, and I hope she ends her splendid career with a national championship.
Brace yourself... this is the final stage! We've finally located Keiichi's most precious memory: it's the ring that rightly belongs on Belldandy's finger. The ring is chained to three magic circles, though, and we have to disable each before Keiichi can reabsorb that memory. Furthermore...
Skuld: If this keeps up, the Spirit of the Silver Watch won't be long for this earth...
The goddesses suggest that we go retrieve that wayward memory and then see what we can do to mend the island. Note that this place, the last stage of the Chaos Zone, has a special name...
Shuuen no Toki (終宴の時/"Hour of the Final Banquet"):
In order to disable the magical shackles on Keiichi's treasured memory, we must journey to miniature versions of the final stage for each of the three goddesses' temporal domains. Luckily, these miniature stages are nowhere near as annoying as the original versions (i.e. Past-4, Present-4, and Future-4). We'll start by tackling mini-Past-4.
Walk up the stairs leading to the purple swap pod and tag in Urd. Head down the rocky passage that appears out of nowhere and you will be transported to mini-Past-4 when you touch the purple magic circle at the end of the path.
Look to the southeast of the starting point for a raised platform inscribed with a purple symbol and strike it with a thunderbolt. Cross the lowered platform and extract the kaminari condition from the Sword Muscle standing near the raised drawbridge. Now look for a switch/antenna mechanism near the center of the stage.
Step onto the switch and use thunder magic on the exposed antenna to flip the stage upside down. Head north and you'll see another raised platform inscribed with a magic symbol.
Strike this platform with a bolt to lower it. Cross the platform and give your kaminari condition to an inert Sude Muscle standing in the northeast corner. This golem should now be equipped with kaminari and susumu.
Activate the Sude Muscle twice with thunderbolts and it will push the wooden turnstile in front of it. Head south and you'll come to another symbol-inscribed platform.
Hit the platform with thunder magic to lower it. Do the same for the symbol-inscribed platform to the southwest. Cross both platforms and look for a Hammer Muscle in the southwest corner of the area.
Extract both the kaminari condition and the miseru action from the Hammer Muscle and backtrack to the Sude Muscle in the northeast corner. Exchange your miseru action for the Sude Muscle's susumu action.
Drop a bolt on the switch/antenna mechanism to flip the stage again. Use thunder magic to lower the symbol-inscribed platform blocking your path to the Sword Muscle. Give the Sword Muscle your kaminari condition and your susumu action (receiving its furu action in return).
Strike the Sword Muscle with a thunderbolt to make it walk up to the drawbridge. Now swap your furu action for the golem's susumu action.
Hit the Sword Muscle with another thunderbolt to make it cut the ropes and lower the drawbridge. Go back to the switch/antenna mechanism and use thunder magic on it to flip the stage. Head for the Sude Muscle in the northeast corner and swap your susumu action for its miseru action. Go back to the switch/antenna mechanism.
Zap the antenna with thunder magic to flip the stage one last time. Cross the lowered drawbridge and look for a Big Muscle to the south. Give this golem your miseru action and it should now be equipped with hito and miseru.
Step inside the Big Muscle's activation radius to trigger its miseru action. Quickly run up the stairs, cross the platform being carried by the Big Muscle, and head up the yellow ramp leading to the green magic chain. As long as you don't dawdle, you'll be able to get to the yellow ramp before the Big Muscle squats back down.
Use thunder magic on the pillar serving as an anchor for the green magic chain. You'll be teleported back to the starting point of the stage (the giant pocket watch with the ring suspended above it).
Tag in Belldandy at the blue swap pod and follow the path leading to the blue magic circle. You'll be teleported to mini-Present-4.
Look for a sorc bot standing on a wooden plank to the east and extract its tsuku action. Now look for a water control mechanism in the center of the platform you're standing on.
Use wind magic on the water control mechanism. Cross the bridge on the southwest end of the platform once the water level stabilizes. Look for a knight bot equipped with the kaze condition and the susumu action. Extract kaze from this robot.
Hit the knight bot with three consecutive wind gusts to rotate it so that it faces the gray switch to the west.
Give your kaze condition back to the knight bot and keep hitting it with wind magic until the robot walks onto the gray switch. Now give your tsuku action to the iron-bound gate to the south.
Step into the iron-bound gate's activation range and head for the other side once the gate lifts itself off the ground. You'll see a mounted mirror mechanism.
Rotate the mounted mirror with wind magic and it will redirect the light ray into (and thus opening) a sun gate. Backtrack to the water control mechanism.
Activate the water control mechanism twice with wind magic to shift the wooden plank with the sorc bot on it. Cross the wooden plank and the L-shaped platform to the southeast. Head through the open sun gate and look for the green magic chain.
Cast wind magic on the green chain to release it. You'll be teleported back to the giant pocket watch.
Tag in Skuld with the red swap pod and follow the path leading to the red magic circle. You'll be teleported to mini-Future-4.
Look for a UFO to your right and extract both its mizu condition and its uku action. Now look for a number light to the north.
Activate this 2-light with a water ball. Try to head south and you'll find your way blocked by the circuitry around a heatsink-like device.
Lob a water ball at the heatsink to cool its circuitry, thus allowing you to pass through. Head back toward the UFO and look for a 2-light to the south.
Activate this second number light with water magic and head for the raised green block. Cross onto the first giant digit (which currently shows a "2") and make your way onto the platform with a colored gate mechanism and a number light showing the digit "4".
Throw a water ball at the colored gate mechanism to raise the red block that'll allow you to cross over to the second giant digit.
Activate the 4-light with water magic and head back onto the first giant digit (which now reads "6"). Cross over to the second giant digit (which currently reads "2") via the raised red block and head for the platform with a R2-san robot on it. Ignore the R2-san and get as close as you can to the number light in the northeast corner of the stage.
Activate this 1-light with water magic and the second giant digit will now show "1" (because the 1-light was a "minus" type that subtracts from the total instead of adding to it). Head down the stairs to the south and go about halfway up the stairs to the east. You should now be within extraction range of a Cublock.
Exchange your mizu condition for the Cublock's hito condition and trade your uku action for its mawaru action. Now stand on the northwest corner of the Cublock and face west. Make sure Skuld is still standing on the platform at the top of the ribbon cable-like stairs (in other words, she should not be standing on top of the Cublock with you).
Have Skuld toss a water ball down the ribbon cable-like stairs. The water ball should land within the Cublock's activation range and prompt it to use its uku action and carry you to the platform above. Get off the Cublock and look for the green magic chain.
Launch a delayed water ball at the green chain and you've finally unlocked Keiichi's most precious memory. Congratulations! You have just finished the game.
The magical shackles fall away from Keiichi's treasured memory like morning mist scattered by a spring breeze... Finally, all four protagonists have recovered their memories.
Keiichi: This ring... I remember it! Belldandy, this is the ring I gave you as a present! Belldandy: Keiichi-san... Please place it on my finger one more time. Belldandy: Do it so that nothing can steal this memory again... Do it so that, no matter what happens, we will never forget this moment. Keiichi: Okay, here we go!
The Spirit of the Silver Watch shows up at the end of the warm and fuzzy moment. She can no longer hold back the rampaging magical energies swirling about the island. The Spirit tells the gang to run away, but they aren't about to oblige.
Keiichi: In order to preserve our bond, we need to sacrifice someone else... there's something wrong with that setup! Keiichi: Besides, what about our bond with you? Spirit: Your bond with ... me? Belldandy: Old bonds always turn into new bonds and, in that way, live forever. Belldandy: The newborn bond between you and us... why don't we sing about that? Keiichi: Never give up! Spirit: You guys...
The goddesses take their positions and use their song magic... to no avail. Space-time is now so warped that their melodies dissipate before reaching their target. Just when all looks lost, a staircase leading to a stable nexus in space-time magically appears. The goddesses try their song magic from the nexus and we get a better result...
Keiichi: The island is returning to normal... Belldandy: It's really beautiful... Spirit: That's right, I'm not alone... Spirit: The island will always be here to keep me company... why did I forget that? Spirit: It's just as Keiichi-san said... Spirit: Thank you, o goddesses of time.
With the island restored, the Spirit of the Silver Watch has disappeared.
Keiichi tries to use his Kikouhoujutsujin, but it no longer works now that the island has been returned to normal. Keiichi decides to take the silver watch home and try to find a way to repair it. He promises to one day return it to this island.
Urd: Looks like we just added another member to our household. Skuld: Oh well, can't help it. Besides, do you really want to say anything contrary to those two (Keiichi and Belldandy) right now? Urd: Nah... Those two are invincible when it comes to stuff like this, anyhow.
Meanwhile, Hildr exclaims over what a quagmire everything turned out to be. Marller thought that Hildr enjoyed the whole thing and says so...
Hildr: Shut up, you. Oh, and Maa-chan... Marller: W-What? Hildr: When the island was about to fall apart, you were the one who sent them that stable nexus, weren't you? Marller: W-What are you talking about? Hildr: Hmm... you're not bad at playing innocent. Hildr: Let my new joint lock submission hold show you the depth of my forgiveness! Marller: Owwwww! It turned out like this in the end, after all!!
The gang takes a boat off the island and the ending sequence plays.
Our heroes finally return home in the epilogue.
Just as Keiichi muses aloud that his senpai's aren't as mean in real life as they were in those stolen memories, Tamiya and Ootaki show up and bully him around. They showed up hoping to get some of Belldandy's delicious cooking, but they don't mind chasing Keiichi around a bit for now (they're, uh, trying to teach him "proper respect for his elders").
Skuld: By the way, Urd... The Hildr from our memories told me something interesting. Urd: Oh? What? Skuld: The identity of the perp who ate my ice cream. Urd: Hear that, Keiichi? Shouldn't you hurry up and apologize? Keiichi: *still being chased* Gaaaaaaaaaaaah! Urd: Or was it Belldandy? Skuld: There's no way oneesamawould do something like that! Urd: ... ... ... but it was so delicious... Skuld: So you doremember! Prepare yourself! Urd: Looks like I have to defend myself, huh! Skuld: Skuld Bomb! Urd: Summon Lightning!
Megumi shows up and the Tamiya/Ootaki duo departs. Keiichi finally gets to ask Belldandy about something that's been bothering him...
Keiichi: Remember Hildr's memory? I'm a bit curious as to what you saw there, Belldandy... Belldandy: I didn't see anything. Keiichi: Then... does that mean you have no desires, Belldandy? Belldandy: *laugh* Even I have hopes and desires, you know. Keiichi: Then... Belldandy: My hopes have already been realized... because what I want is "to stay by Keiichi-san's side".
No intro dialogue for this stage, which is a short and painless affair. You'll see two new devices around here -- a control dial mechanism and a strange contraption consisting of a magic sigil inside a glass case -- but they're not hard to figure out.
When the stage begins, head for the control dial mechanism inside the doorway and trigger a cutscene. This device uses the susumu action to rotate the conveyor belt behind it (which in turn transports the cased sigil contraption to different locations around the belt). Use the red swap pod to the southeast to summon Skuld. Now try to get as close to the cased sigil as you can.
Launch two delayed water balls at the case and the red portion of the magic sigil will disappear. Now step into the control dial's activation radius and watch the cutscene.
Activate the control dial two more times to transport the cased sigil to a position on the northwestern side of the conveyor belt. Use the blue swap pod in the northeast corner of the room and then get as close to the cased sigil as you can.
Have Belldandy launch two gusts of wind at the glass case and the green portion of the sigil will disappear. Backtrack to the control dial mechanism and activate its hito condition two more times. The cased sigil should now be located on the eastern end of the conveyor belt. Tag in Urd at the purple swap pod to the southwest and then get as close to the cased sigil as you can.
You should be able to launch a delayed thunderbolt at the glass case through the obstructing machinery. Do this twice and the final third of the magic sigil will be destroyed. Use the stairs in the northeast corner of the room and keep going until you pass a retry gate. Head for a room that contains a second control dial mechanism and a second cased magic sigil.
Extract the mizu condition equipped on the R2-san robot nearby. Exchange mizu for the control dial's mono condition and then use the red swap pod east of the dial.
Lob a water ball at the control dial and watch the cutscene highlighting its miseru action. Head for the purple swap pod and summon Urd. You'll see the cased sigil doing its best whack-a-mole rendition (i.e. appearing and disappearing rapidly) at the cluster of six holes to the north.
Get as close to the six holes as you can and try to zap the cased sigil with thunderbolts before it disappears down one of the holes. Do this twice and the purple portion of the sigil will disappear. Now exchange your mono condition for the hito condition equipped on the Sword Muscle nearby and extract its tsuku action. Head back to the control dial and swap your tsuku action for its miseru. Cross the red swap pod and look for an iron-bound gate to the northeast. Give the gate your hito condition and exchange your miseru action for its hiraku action.
Step into the iron-bound gate's activation range to unlock an encyclopedia entry. Backtrack toward the control dial and position yourself just east of the red swap pod.
Launch a delayed water ball at the control dial to activate its tsuku action. Watch the cutscene and quickly run to the blue swap pod in the southeast corner. Summon Belldandy and run to a position due east of the glass case holding the magic sigil. You should see a metal beam extending into the glass case. Face the glass case and use Belldandy's magic.
The wind gust will descend onto the metal beam and travel along it until finally hitting the magic sigil. Repeat this entire procedure (tag in Skuld, activate the control dial's tsuku action with water magic, tag in Belldandy, launch wind magic at the metal beam) and the green portion of the magic sigil will disappear for good. Backtrack across the red swap pod (tagging in Skuld in the process) and exchange your hiraku action for the control dial's tsuku action. Give tsuku to the iron-bound gate to the northeast. Backtrack and once again position yourself just east of the red swap pod.
Toss a delayed water ball at the control dial to activate hiraku and watch the cutscene. Now run toward the iron-bound gate.
The gate will use tsuku and lift itself off the ground as soon as you step into its activation range. Now head for a spot on the other side where the retracting metal pillars have given you a window for attacking the cased sigil. Get as close to the magic sigil as you can and try to "bump" Skuld (i.e. run into her on purpose) to the edge of the platform.
Lob two delayed water balls at the cased sigil through the gap between the metal pillars. You'll have to work quickly to get both shots in before the metal pillars close again. By destroying the red portion of the magic sigil, you've opened up the path leading to a second retry gate. Go through the doorway in the northeast corner of the room and ascend the staircase. Once you pass the retry gate, a cutscene will play and let you know that you'll need to manipulate some robots/golems in order to destroy the cased sigils in this final section of the stage. Extract the kaze condition from the knight bot near a cased sigil and head for the control dial mechanism located inside a room to the north. There are three swap pods (one of each color) just inside the doorway.
Use the blue swap pod to summon Belldandy. Now exchange your kaze condition for the control dial's mono condition. Backtrack to the cased sigil surrounded by the knight bot and a sorc bot. Notice that the sorc bot is equipped with the kaze condition and the tsuku action.
Activate the sorc bot's tsuku action with wind magic. Do this two more times and the sorc bot's three fireballs will obliterate the magic sigil for good. Extract the kaze condition from the sorc bot and go back to the control dial mechanism.
Activate the control dial's mawaru action with wind magic. Head back toward the retry gate and you'll see a new cased sigil -- this one is surrounded by a Sude Muscle and a Hammer Muscle. Extract the tsuku action from the Sude Muscle and exchange your kaze condition for the Hammer Muscle's kaminari condition.
Throw three wind gusts at the Hammer Muscle and it will obliterate the magic sigil with three swings of its hammer. Backtrack to the control dial mechanism.
Activate the control dial's mawaru action with another dose of wind magic. Use the purple swap pod near the doorway and backtrack toward the retry gate. You'll see a third cased sigil lodged between a R2-san robot and a Cublock. Give both your kaminari condition and your tsuku action to the Cublock.
Drop a thunderbolt into the Cublock's activation range (but do not zap the Cublock itself) to unlock an encyclopedia entry. Extract the kaminari condition from the Cublock and exchange it for the R2-san's mizu condition.
Drop a delayed thunderbolt into the center of the cased sigil. Since the glass case containing the sigil is located inside the R2-san's circular activation radius, the robot will hover forward, pull out a hammer, and strike the cased sigil.
Repeat this procedure two more times and the R2-san will obliterate this third and final magic sigil. Extract the furu action from the R2-san and head back to the room with the control dial mechanism. Tag in Belldandy at the blue swap pod and giveyour furu action to the control dial.
Use wind magic on the control dial to unlock an encyclopedia entry. Exit the room through the passage to the north. Ascend the translucent staircase and follow it all the way up to the end of the stage.
Keiichi's missing memories are nowhere in sight.
This entire clock tower was merely an obstacle blocking your path to the place where Keiichi's memories really are. Furthermore...
Skuld: It seems that we haven't really stopped the island from falling apart... Belldandy: Looks like we can't do it without recovering Keiichi-san's memories.
We'll have to move on and hopefully regain those pesky memories in Chaos-5.
All original material (reviews, walkthroughs, anything else you can cite if somebody made you write a term paper on, I dunno, how much ADV sucks or something) found on this blog is copyrighted Terminal Dogma 2007 and remains the intellectual property of the author(s). Any use of the material found here without proper crediting us is prohibited. If necessary, we will track you down to the ends of the earth and bludgeon you with David's metal bat.
 Before we begin, let me expound for a bit on learning Japanese.


